
One Room Challenge | Week 4 Demo and Design Plans
Hello! First of all, if you’re new here WELCOME! I’m Libby, an Interior Designer based in Philadelphia and specialize in beautiful design made for real life. Originally from Denver, I add my west coast aesthetic to historic and classic East Coast homes
This post is part of an 8 week series for the One Room Challenge, where designers and bloggers from all over makeover one space in their home from start to finish. I’m tackling our main bathroom renovation. Thanks for following along, I can’t wait to show you what I have in store. Check back weekly for updates.
Previous Posts: Week One

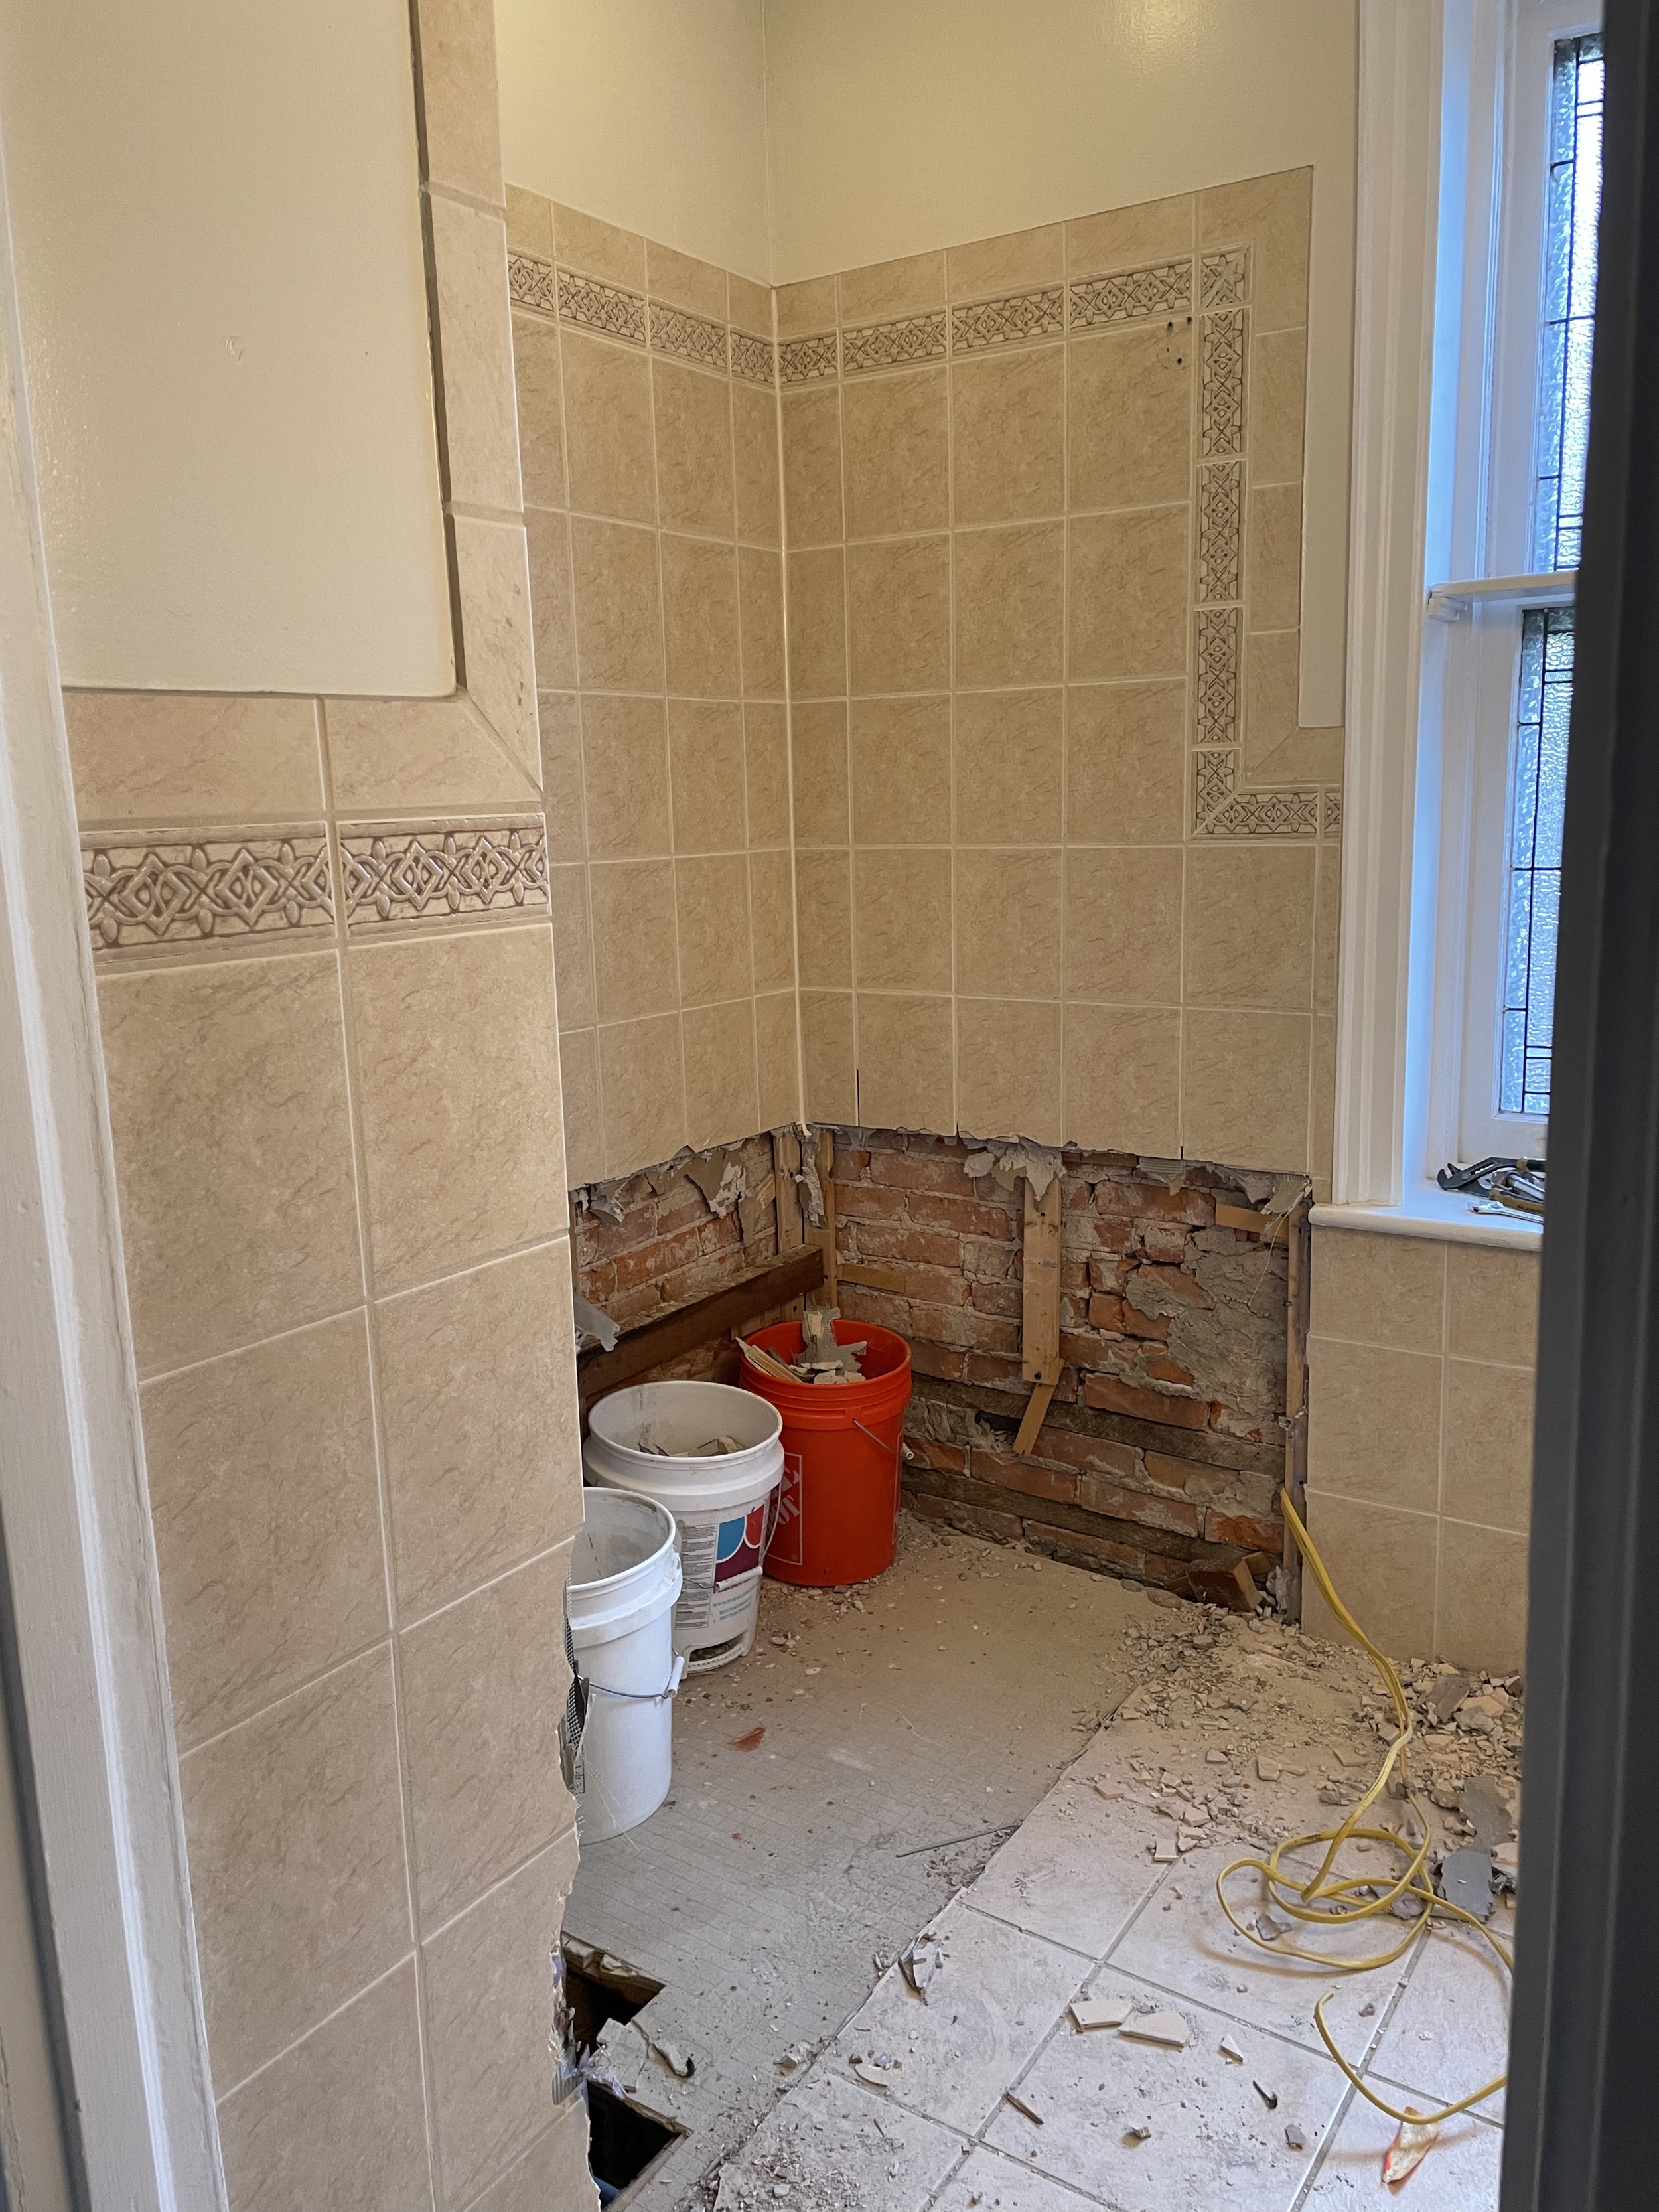
I’m back with an update on the Bathroom Progress for the One Room Challenge! We were are off to a bit of a slow start. We completed the demo ourselves week one, and our contractor started putting the space back together this week. I didn’t have a lot to share week 2 and 3, so I mostly just gave updates on Instagram rather than a full length blog post. But at the halfway point here, I have quite a bit to share.
If you don’t know or haven’t followed along you may not know that my husband, Scott is an electrician. Which, comes in super handy. He took care of the demo and rough-in electrical then we’ve hired a contractor and plumbing to fill in the gaps on the project then he will come in and hang the rest of the lighting and finish us off. This helps us save a bit of money which is always great if you have the skills and the desire to do a project yourselves.
Floor Plans and Expansion
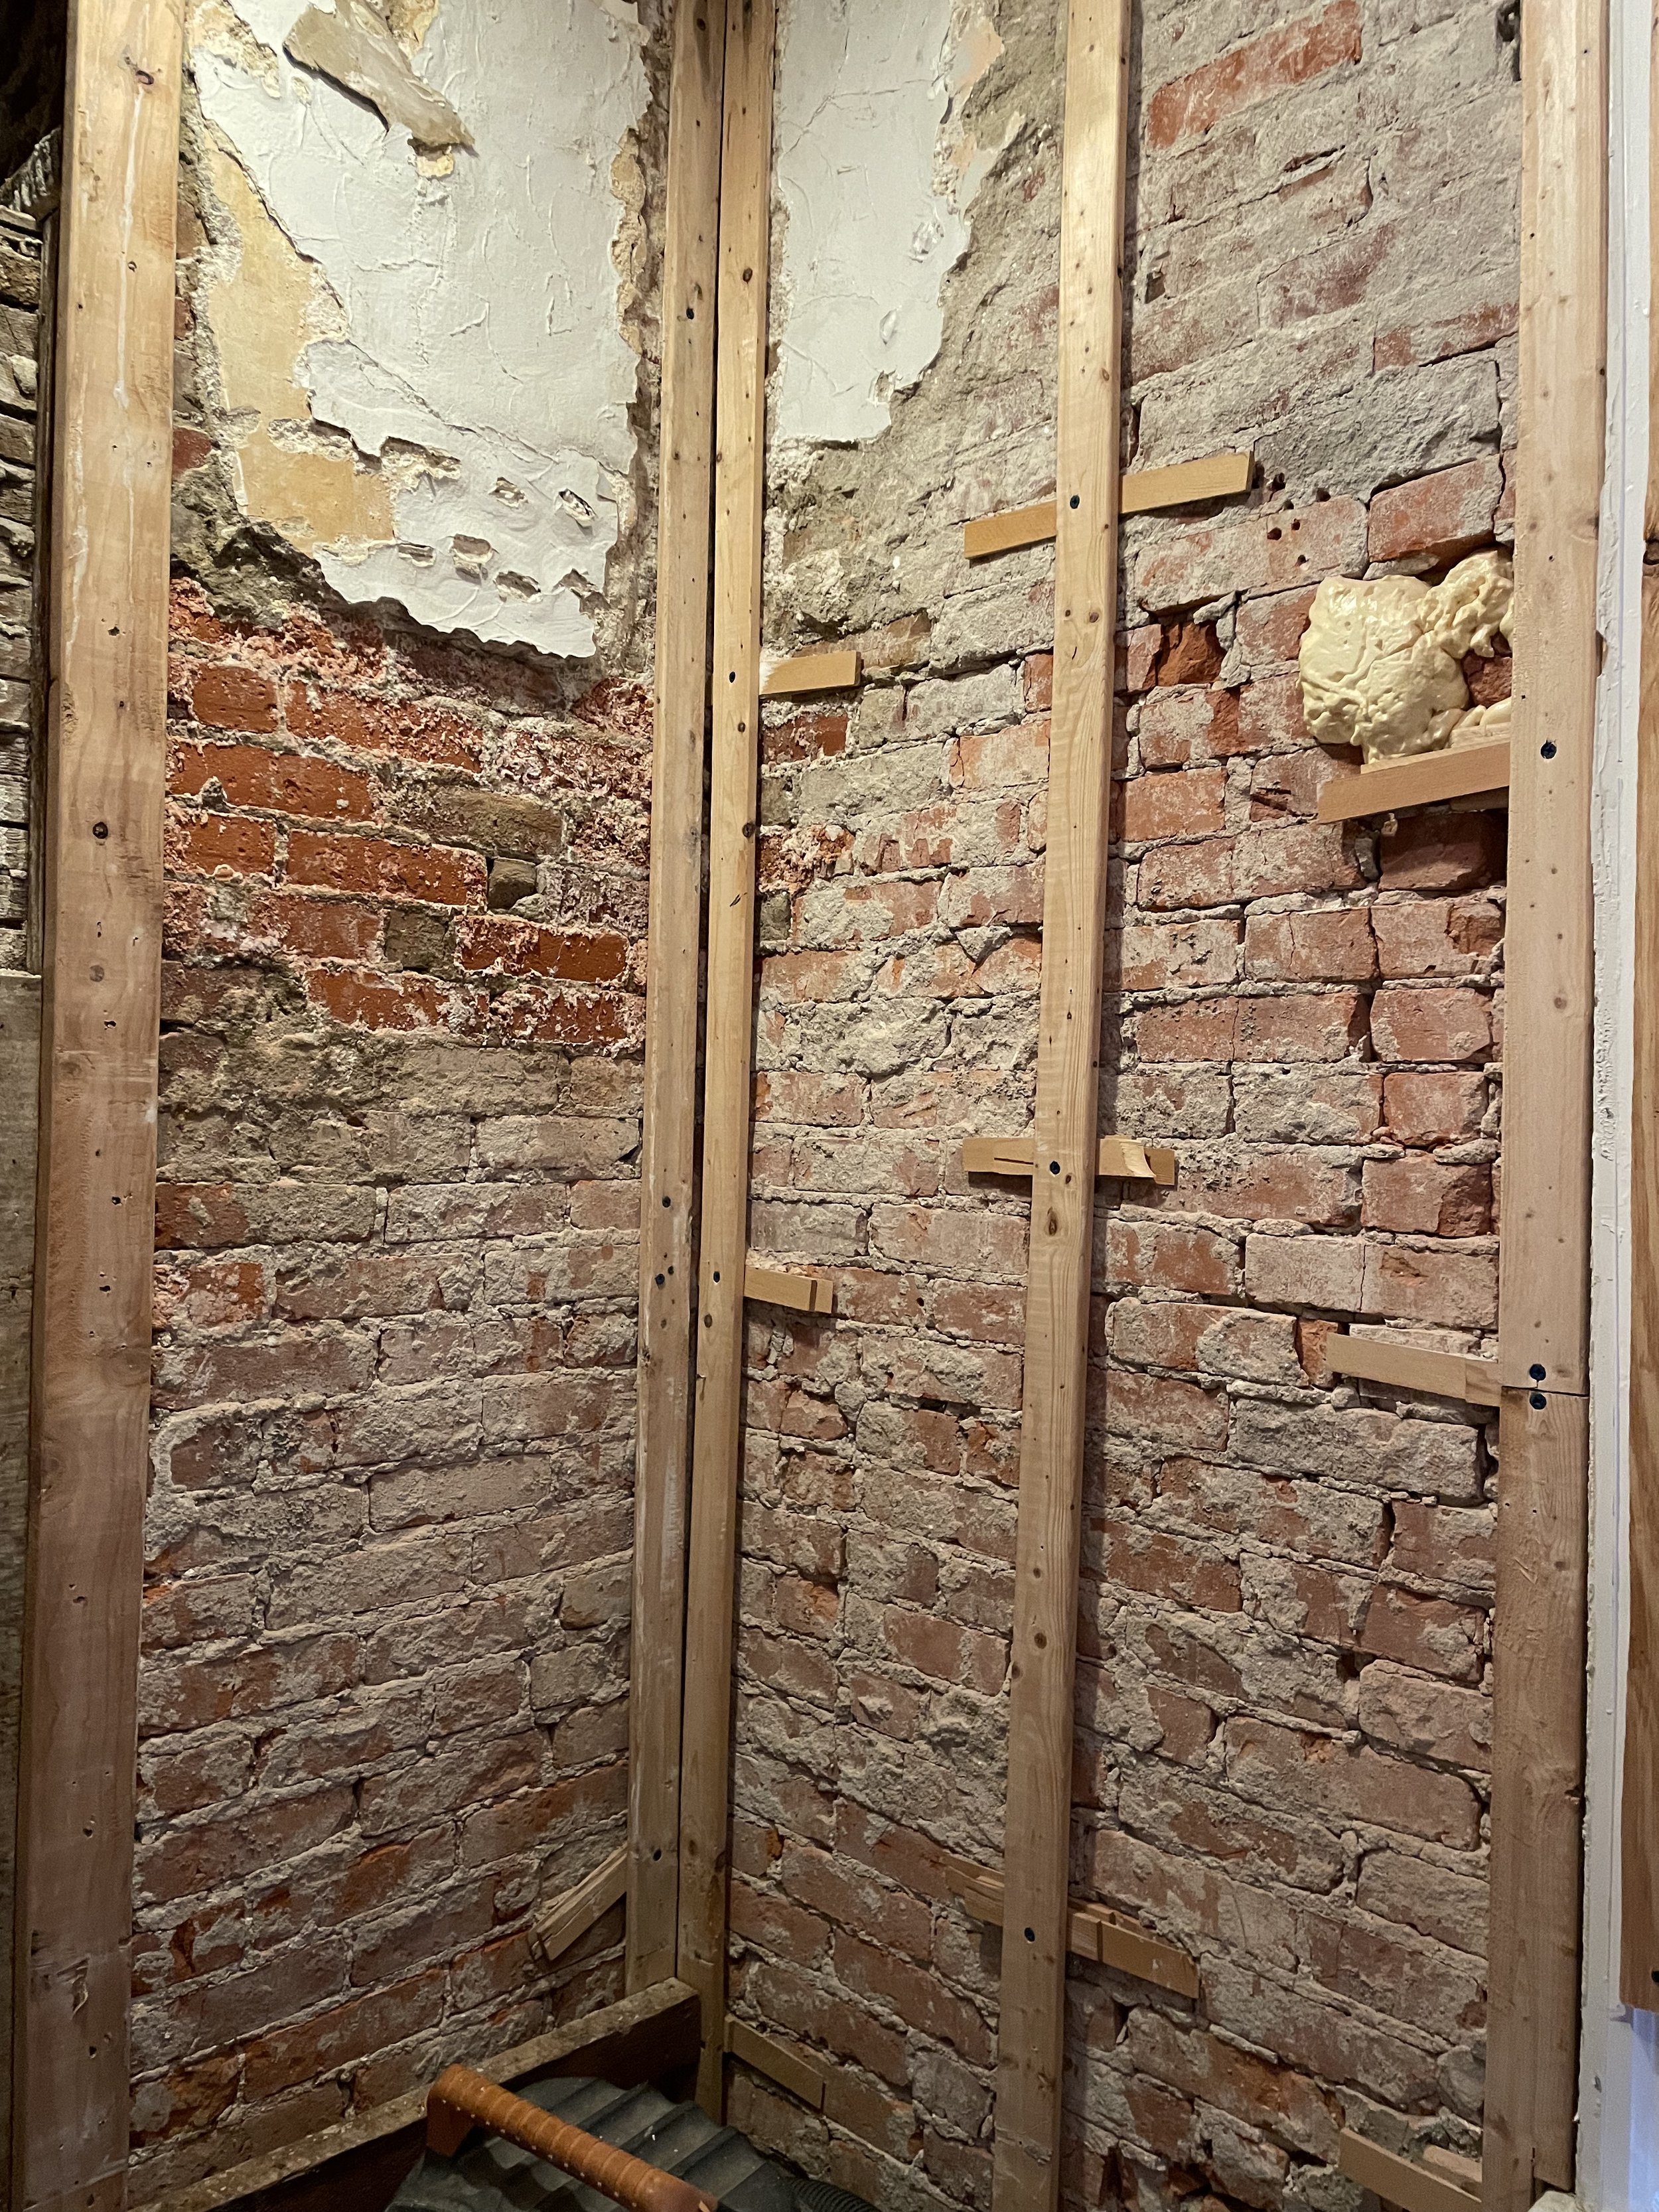
Old Houses = small bathrooms (usually). What they lack in bathroom space is made up by irreplaceable charm and architectural detail. But either way I wouldn’t mind some more space. My dream when starting this project was to expand into a secret closet that we found this summer when Scott was updating the old electrical in the house. Expanding the bathroom was going to give us about 25 inches of extra space - which in a bathroom is a lot. But there are some challenges… challenges. First, there is a chimney in the back corner that we have to work around and it’s very hard to get a read on how large it is. The only way to try to get a read on the size was to take off a lightswitch on the wall and try to shove a tape measure in there. When we measured we also looked around in the attic and basement to get a read on the size. It was close, but we thought we would have just enough space.
We also have a big and beautiful original stained glass window that I love but with the window and the chimney options for reconfiguring the space was very limited/impossible to allow for a double vanity. But the good news was we could make the whole space bigger, right?!?!

We planned to relocate the toilet closer to the window, keep an alcove tub but move it to the left and back into the secret closet space. Then we would put a small linen closet on the side next to the window. This would allow for the same size tub (we hoped) a linen closet that I envisioned with some open shelves above and some cabinets below.
We decided on a custom vanity from Village Handcrafted Cabinetry here in the Philadelphia area. I have worked with them on other projects for clients and they do amazing work, I can’t recommend them enough. I love being able to customize cabinetry and choose all my perfect colors and finishes. We did a simple flat panel inset cabinet on legs with all drawers. It is painted Farrow and Ball Light Gray. Which is not really gray at all, but more of a warm taupe color. It feels like a piece of furniture and I think it is such a showstopper.


It was delivered last week and is currently sitting in the hallway. It is so pretty in person. I may or may not have already bought organizers and put them in the drawers. I literally can’t wait

So back to demo. The plans were set, we were excited to get started and swung the hammer to begin demo and realized pretty quickly that the chimney was too big to allow for use to use the closet space and expand the bathroom! So my dreams of an enlarged bathroom were dashed in an instant. I tried every which way to figure out how we could try to make it work. But short of bagging the tub and adding a shower (that we hadn’t purchased material for, and isn’t great for resale when the main bathroom has no tub) we were stuck between a chimney and a hard place. We decided to stick with the original floorplan and an alcove tub. After I accepted the reality of the situation I realized it wasn’t the end of the world. It will still be beautiful!
If you follow along on Instagram you may have seen my stories showing the chimney and the space we were trying to expand into. If not, go check it out. You can find it in my highlights under ORC

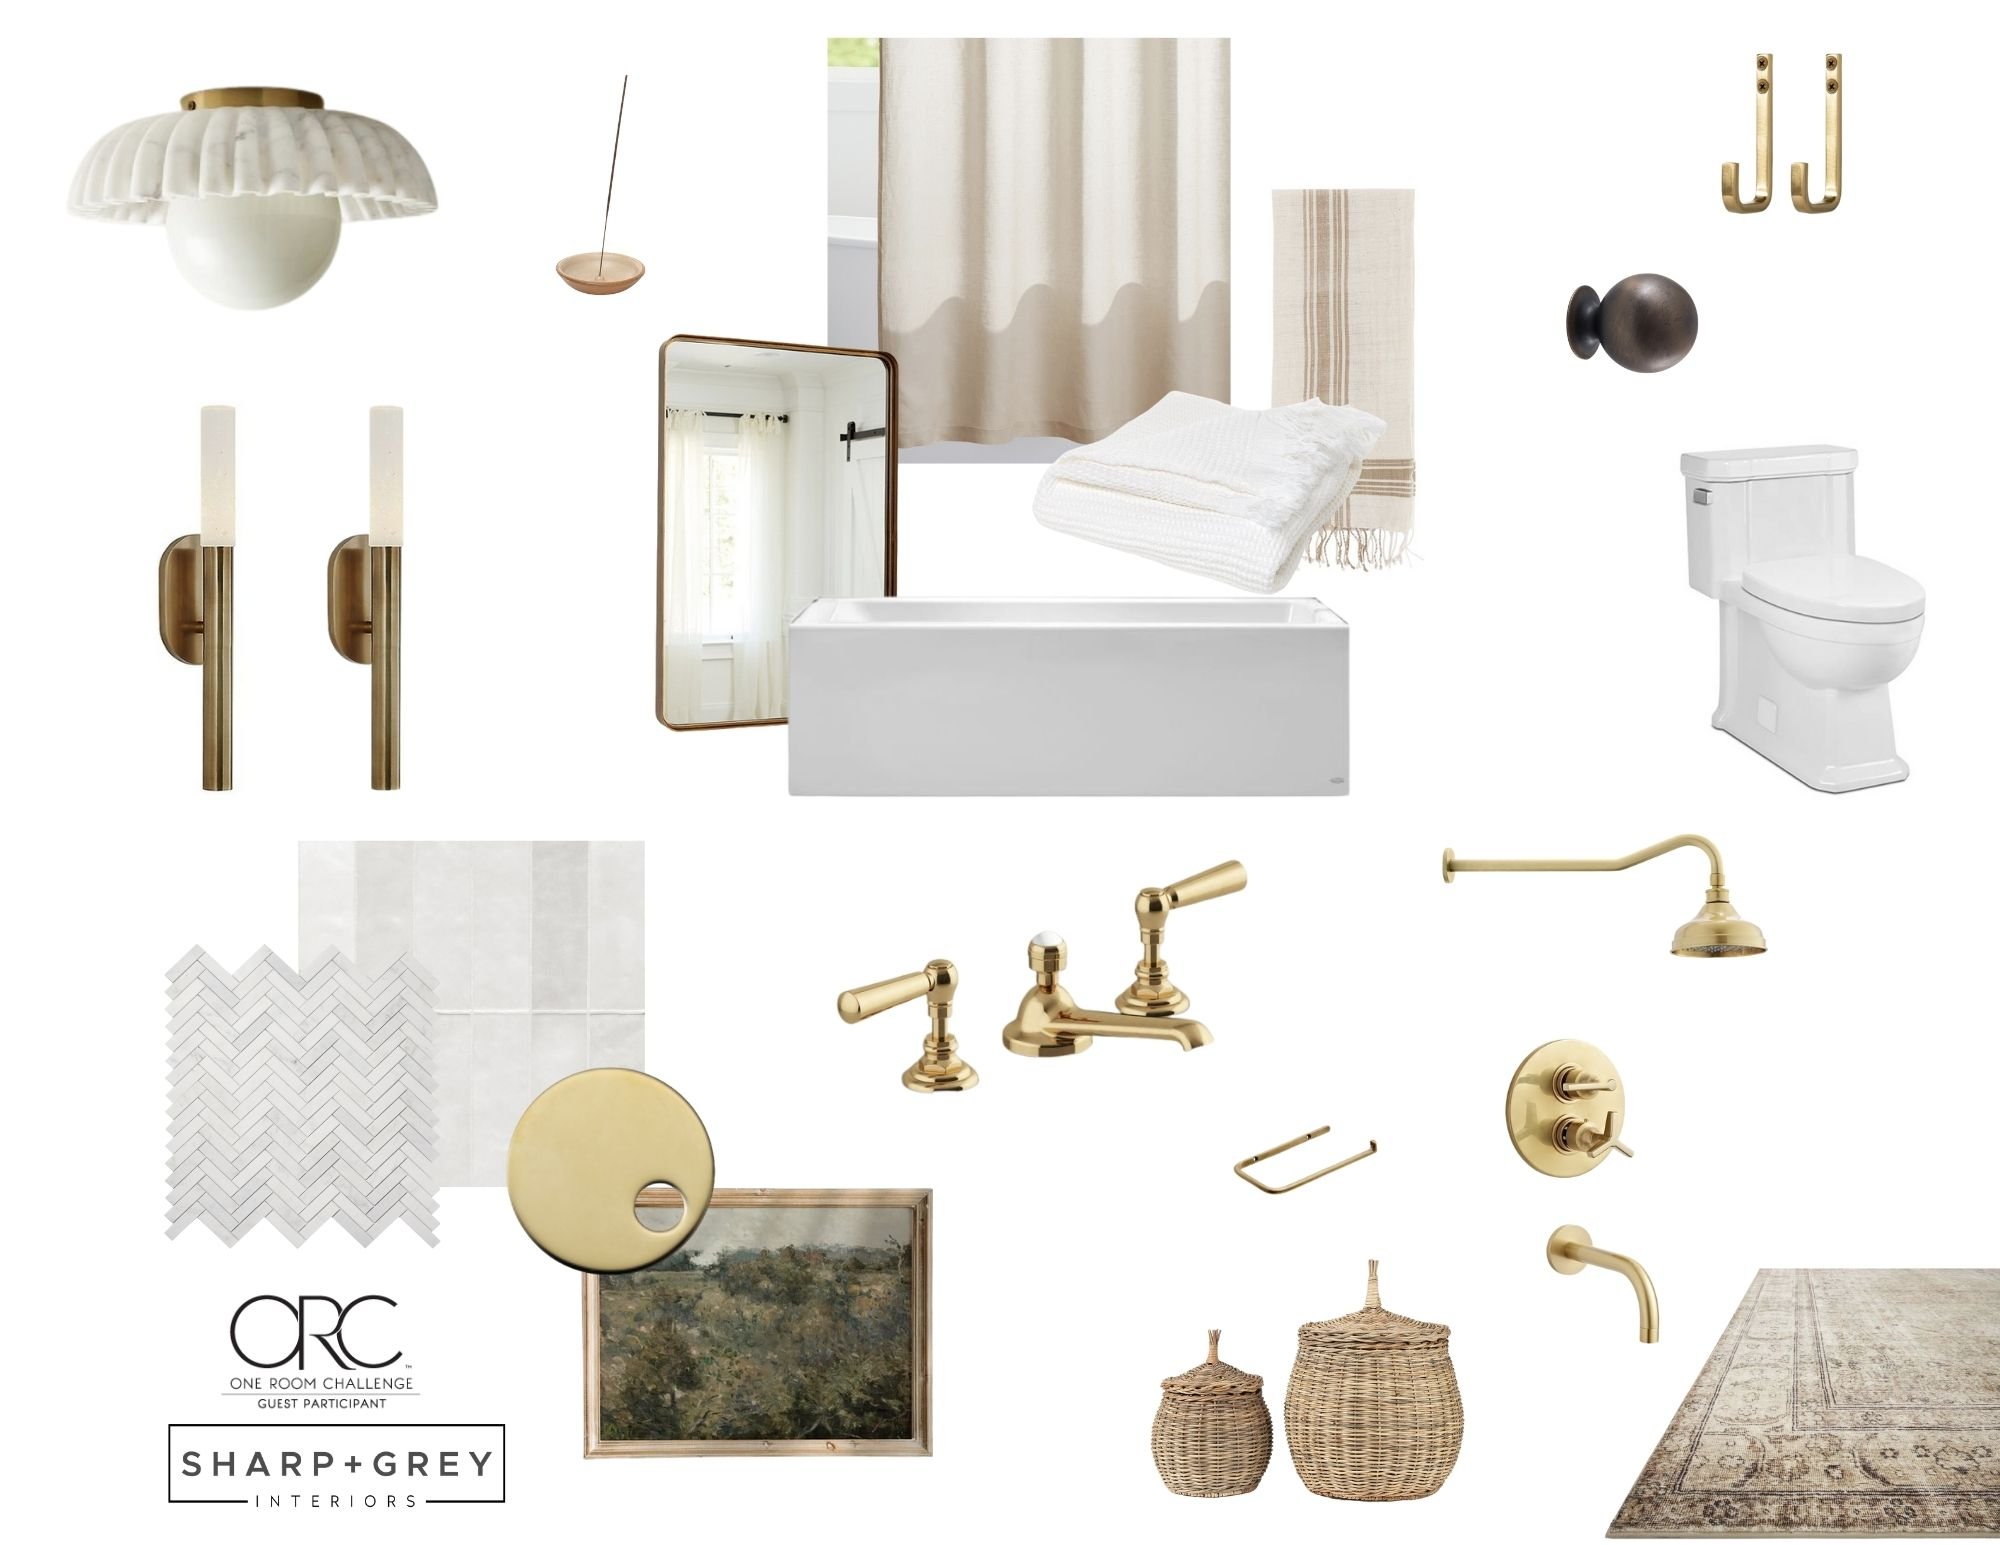
Design Board
Week one I shared the mood board for the space. Whenever I work on a design I start with a mood board that is a bit more conceptual and becomes the visual representation of the overall look and feel of the project. Today I’m sharing the design board which shows more detailed selection. This shows you how all the elements will come together in the design.
I really leaned into a neutral textural space with touches of marble throughout, lots of subtle texture, and warm, textural, and earthy accessories.
One of my favorite things about the space (and one of the decisions I agonized about the most) is the plumbing. We chose Watermark fixtures in unlacquered brass which we purchased from our local plumbing shop Flow. The style has a classic feel with a bit of a modern edge. Many times I like to mix metals throughout a space, but this time I really wanted the warmth of brass and decided I wanted it to run throughout.
I did add a slight bit of contrast with the mirror and the Rejuvenation hardware in a pretty oil-rubbed bronze. The floor tile is a marble herringbone and the shower walls are Handcrafted White tile from Alexander James (Use code Sharp 15 for 15% off). I had my eye on a white zellige tile, but the budget just wouldn’t allow it. I think the handcrafted white will give a very similar look with some variation in the color as well as the texture all for less.
The marble is brought to the ceiling with the cutest little fixture from CB2. When I said I agonized over the plumbing… well this decision was quick I loved this light the minute I saw it. It’s currently been ordered for weeks and delivery keeps getting pushed farther farther, so fingers crossed it makes it here on time! The sconces have also been delayed and I’m hoping those are here on time as well. It really is just the way it goes lately in the industry. It’s really hard to wait for something that you are excited about, but so much has been back-ordered and/or lost/stuck at the ports, I just have to be patient. Which really isn’t my thing… but I will try.
Shop the Look
Floor Tile | Wall Tile (Use Code Sharp15 for 15% off)

I will be sharing more about the design and the process in the coming weeks. Next week the vanity should be in and we are getting countertops templated. We will be finishing up the walls, and starting in on the tile shower. Can’t wait for you to tune in for the next installment.
Don’t forget to follow along on Instagram, Facebook and Pinterest and check out the rest of the ORC participants as they redesign their spaces!
Real Life. Well Designed.
Sharp + Grey Interiors is a full-service interior design studio specializing in creating beautiful yet highly livable spaces that feel as curated to how our clients live, as they are to their personal tastes and style. Sharp + Grey offers a wide variety of flexible design options, from full-service interior design where we do it all, to consultations and custom E-design services that give you the ideas or design plans to install your design project yourself. With a focus on creativity and collaboration, Sharp + Grey Interiors can help you create a home you love with fresh and inspired design made for real life.